
Step 3: Set-up API Permissions in Azure
API Permissions
24Files operates using delegated permissions because it is designed to work with an integration user rather than relying on the client credentials grant flow. As a result, application permissions (which are typically used in system-to-system authentication) are not supported in 24Files.
SharePoint Permissions
Navigate to API permissions in the Azure portal. Click on Add a permission, scroll down and select SharePoint.
Now select ‘Delegated permissions’. Use the search bar to quickly navigate to the options below
Select following two options:
1. AllSites.Write
2. Sites.Search.All
After selecting the options, click “add permissions”.
The AllSites.Write permission in SharePoint is similar to the standard Contribute permission, allowing an app to add, edit, and delete content in document libraries. However, it cannot create new libraries or modify the structure of existing ones.
This permission enables an app to edit, create, and delete content across all SharePoint sites that the user or app has access to, but it does not provide full read access—the app can only modify data that it already has permission to access.
For complete control over a site, the FullControl permission is required, granting the ability to create, read, update, and delete everything, including managing the site structure. However, for 24Files, this FullControl permission is not necessary.
Once the AllSites.Write permission is granted at the tenant level, only users who have the necessary rights (via OAuth) to access and upload data to a library can contribute. In other words, even with Write permissions at the tenant level, only users with explicit upload permissions can perform these actions.
Microsoft Graph Permissions
Next, we will configure Microsoft Graph permissions.
Navigate to API permissions in the Azure portal. Click on Add a permission, scroll down and select Microsoft Graph.
Now select ‘Delegated permissions’. Use the search bar to quickly navigate to the options below.
Select following options:
Offline access
Open ID
After selecting the two options, click “update permissions”.
Grant admin consent
Click “Grant admin consent for {your_company}” next to “Add a permission”.
After you granted the permissions as described above, your granted permissions should look as follows:
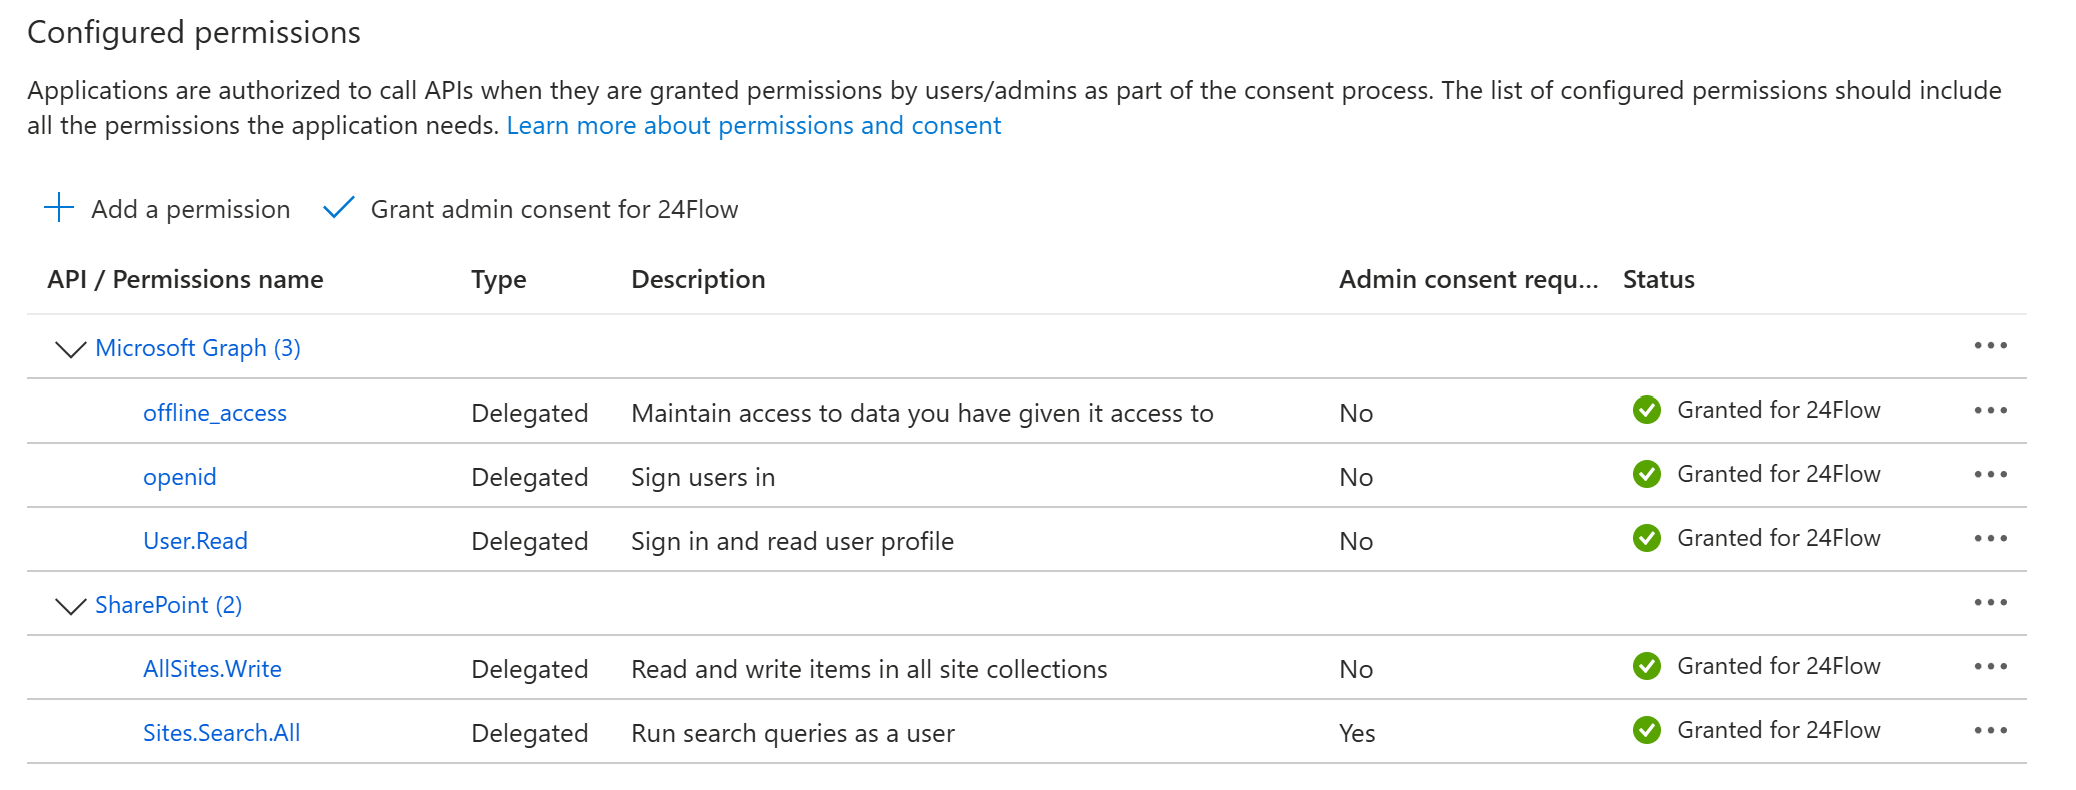
Permissions of the Azure App Registration.